By [Jawad Shah] – Finance & Expense Automation Specialist
If you’ve ever wondered where your money actually goes each month, you’re not alone. An expense tracker is the tool that finally gives you that answer—and I’m going to show you exactly how to set one up today. Whether you’re a student trying to stretch a tight budget, a freelancer managing irregular income, or simply someone who wants to stop overspending, this guide walks you through everything you need. By the end, you’ll have a working system plus a free template to download.
➡️ Use the Free ExpenseTrackerTool.com Tool
TL;DR Summary:
- An expense tracker records every transaction so you can see where money goes
- You only need 3 steps: capture, categorize, and review
- The best categories are simple (10 or fewer to start)
- Daily tracking takes 60 seconds when you build the right habit
- Download a free expense tracker template below (Google Sheets + CSV)
What Is an Expense Tracker? (Definition + What It’s Not)
An expense tracker is a system that records transactions (date, amount, category, merchant) so you can see where money goes and make informed decisions.
Think of it as a spending log for your financial life. Every time money leaves your account—whether through cash, debit, or credit—you log that expense. Over time, this simple expense tracker reveals patterns you’d never notice otherwise.
A personal expense tracker isn’t about restriction. It’s about awareness. You’re not judging your spending; you’re documenting it.
Expense Tracker vs Budget (Quick Comparison)
I hear this question constantly: “Isn’t budgeting vs expense tracking the same thing?”
Not quite. Here’s the difference:
| Feature | Expense Tracker | Budget Planner |
| Primary function | Records what you spent | Plans what you’ll spend |
| Timing | After the transaction | Before the month starts |
| Goal | Awareness and pattern detection | Spending limits by category |
| Requires estimates? | No | Yes |
A budget tracker tells you what should happen. An expense tracking tool tells you what actually happened. The magic occurs when you use both together—but you need the tracker first.
Why Tracking Works (The Mechanism)
The reason a money tracker changes behavior comes down to four steps:
- Awareness – You see every transaction
- Categorization – You organize spending into buckets
- Pattern detection – You spot trends and leaks
- Behavior change – You make smarter decisions next month
This cycle repeats monthly, and each review gets easier. That’s why the best expense tracker tools focus on simplicity—not complexity.
How an Expense Tracker Works (in 3 Steps)
Every expense tracking tool—whether it’s a spreadsheet, app, or online expense tracker—follows the same basic workflow.
Step 1: Capture Transactions
You record each transaction as it happens. This can be manual entry (typing it in), importing bank transactions, or even using a receipt tracker to snap photos. The key is capturing the data before you forget.
Step 2: Categorize
Every expense gets a category. This is where you turn raw numbers into useful information. Good categorization means you can analyze spending patterns and identify overspending instantly.
Step 3: Review & Adjust
Weekly or monthly, you review your category breakdown and compare it against previous periods. Then you set one rule for next month (more on this later).
Data Fields You Should Track
| Field | Why It Matters |
| Date | Timing shows patterns |
| Amount | The core data point |
| Category | Groups’ spending for analysis |
| Merchant/Payee | Shows where money goes |
| Payment Method | Cash, debit, and credit tracking |
| Notes/Memo | Context for unclear expenses |
| Recurring (Yes/No) | Flags subscriptions and bills |
Set Up Your Expense Tracker in 10 Minutes (Beginner-Friendly)
You don’t need fancy software. A simple expense tracker can run on paper, a spreadsheet, or a dedicated tool. Here’s how to set yours up quickly.
Choose Your Tracking Period
Most people use a monthly expense tracker because it aligns with billing cycles and paychecks. However:
- Daily expense tracker – Best for building the initial habit
- Weekly tracking – Good middle ground for cash flow tracking
- Monthly tracking – Standard for monthly spending summaries
Start with daily logging, then review weekly and monthly.
Pick Your Method (Tool vs Spreadsheet vs App)
| Method | Pros | Cons |
| Expense tracker spreadsheet | Free, customizable, works offline | Requires manual formulas, no automation |
| Expense tracker app | Mobile-friendly, automatic categorization | May require account linking, privacy concerns |
| Online expense tracker tool | No downloads, easy CSV import/export | Requires internet |
Decide Your “Source of Truth”
Pick one place where your final numbers live. If you track in multiple places, you’ll get confused. One expense log = one source of truth.
Conversion tip: If you want the fastest setup, use ExpenseTrackerTool.com (no spreadsheet formulas needed)
The Best Expense Categories (With a Ready-to-Copy List)
Good expense categories for budgeting make or break your tracking system. Too many categories? You’ll give up. Too few? You lose insight.
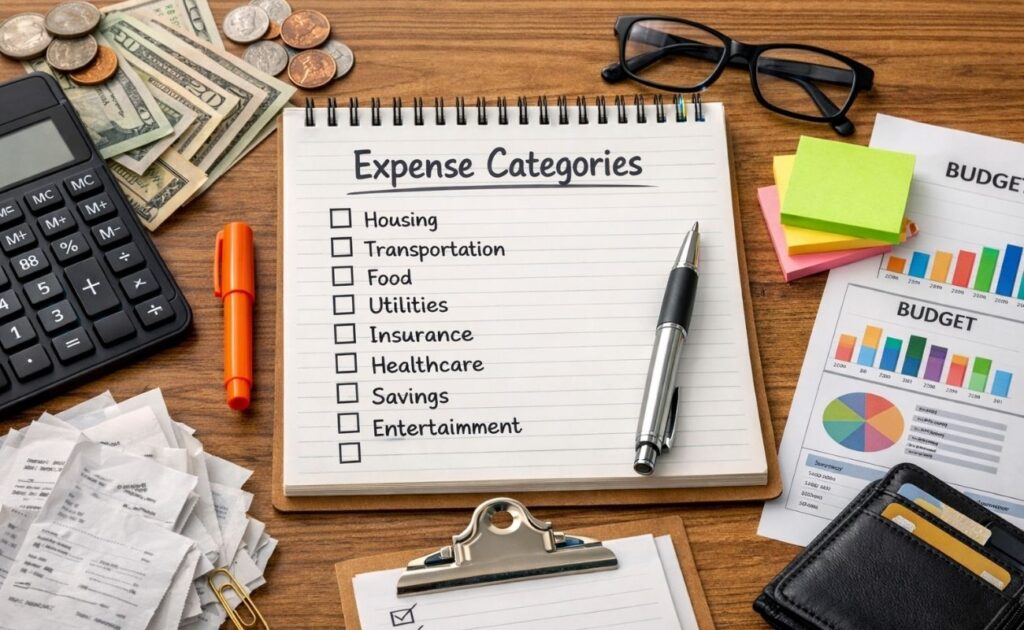
Starter Categories (Simple)
Start with these 10 monthly budget categories:
- Housing (rent/mortgage)
- Utilities (electric, water, internet)
- Groceries
- Transportation (gas, maintenance, public transit)
- Dining Out
- Healthcare (insurance, prescriptions)
- Entertainment
- Subscriptions (streaming, software, memberships)
- Savings/Emergency Fund
- Debt Payments
When to Split Categories
Split categories when the combined total hides useful information:
- Groceries vs Household Supplies – Groceries are food; household is cleaning products
- Dining Out vs Coffee – That daily latte adds up
- Gas vs Car Maintenance – Different spending patterns
Common Category Mistakes That Ruin Reports
- Creating 30+ custom categories (analysis paralysis)
- Using vague labels like “Miscellaneous” for everything
- Changing categories mid-month (inconsistent data)
📥 [Download: Expense Categories Cheat Sheet (PDF/CSV)]
Daily Expense Tracking Routine (So You Actually Stick With It)
The hardest part of any spending tracker isn’t the setup—it’s the habit. Here’s how to make it stick.
The 60-Second Daily Rule
Log expenses immediately after purchase OR set a daily reminder to log everything at once. Most people succeed with one fixed time—right after dinner or before bed. Sixty seconds is all it takes.
Cash Spending Strategy
Cash is harder to track because there’s no automatic record. Try these approaches:
- Keep receipts in your wallet and log them daily
- Round up cash purchases (easier to remember)
- Use a “cash envelope” category and track the total withdrawn
A cash expense tracker works when you build the receipt capture habit.
Recurring Expenses (Subscriptions, Rent, Bills)
Tag recurring transactions separately. Your subscription tracker should flag:
- Monthly subscriptions (streaming, gym, software)
- Quarterly payments (insurance)
- Annual renewals (domains, memberships)
Most people forget recurring expenses until they see the bill/due date. Tagging them helps you monitor subscriptions proactively.
Weekly & Monthly Review (The Part Competitors Usually Skip)

Logging expenses is only half the equation. The real value comes from review—and this is where most people drop the ball.
Weekly: Spot Leaks
Every Sunday, spend 5 minutes reviewing:
- Your top 3 categories by spending
- Any unusual spikes (one-time purchases)
- Whether you’re on track for the month
This weekly spending summary catches problems early.
Monthly: Compare Against Last Month
At month’s end, generate reports that show:
- Total spending vs last month
- Category breakdown changes
- Cash flow (income vs expenses)
Look for trends and averages. Did dining out increase 40%? Did subscriptions creep up?
Create 1 “Next Month Rule”
Don’t overwhelm yourself. Pick one rule:
“Next month, I’ll cap dining out at $150.”
That’s it. One rule, one focus. This approach creates sustainable behavior change.
Mini Dashboard Example
| Category | This Month | Last Month | Change |
| Groceries | $420 | $380 | +$40 |
| Dining Out | $210 | $150 | +$60 |
| Transportation | $180 | $190 | -$10 |
| Entertainment | $85 | $120 | -$35 |
Example: A Real Monthly Expense Tracker (Sample Data + Insights)
Let me show you what a working income and expense tracker looks like.
Sample Transaction Table
| Date | Merchant | Category | Amount | Payment Method | Recurring |
| 01/03 | Landlord | Housing | $1,200 | Bank Transfer | Yes |
| 01/05 | Whole Foods | Groceries | $87.50 | Debit | No |
| 01/07 | Shell Gas | Transportation | $45.00 | Credit | No |
| 01/08 | Netflix | Subscriptions | $15.99 | Credit | Yes |
| 01/10 | Chipotle | Dining Out | $14.25 | Debit | No |
| 01/12 | Electric Co | Utilities | $95.00 | Bank Transfer | Yes |
| 01/15 | Amazon | Entertainment | $29.99 | Credit | No |
| 01/18 | Trader Joe’s | Groceries | $62.30 | Debit | No |
| 01/20 | Uber | Transportation | $18.50 | Credit | No |
| 01/22 | Starbucks | Dining Out | $6.75 | Cash | No |
Category Totals
| Category | Total |
| Housing | $1,200 |
| Groceries | $149.80 |
| Utilities | $95.00 |
| Transportation | $63.50 |
| Dining Out | $21.00 |
| Subscriptions | $15.99 |
| Entertainment | $29.99 |
3 Example Insights
- Where money went: Housing dominates (expected), but groceries are tracking higher than last month
- What changed: Dining out dropped significantly—the $150 cap from last month worked
- Next month’s action: Set a spending limit on entertainment subscriptions
Free Expense Tracker Template (Google Sheets + CSV)
I’ve built a free Google Sheets expense tracker template that works with any tool you choose.
What the Template Includes
- Transactions tab: Log every expense with all key fields
- Categories tab: Pre-built list with custom categories option
- Monthly Summary tab: Automatic category breakdown and charts
- Dashboard: Visual pie chart and bar chart of spending
How to Use It (3 Steps)
- Make a copy of the Google Sheets template
- Enter your transactions daily
- Review the dashboard weekly
How to Export/Import (CSV)
- Export to CSV: File → Download → CSV
- Import bank transactions: File → Import → Upload your bank’s CSV
This data export feature lets you move between spreadsheets and tools easily.
📥 [Download: Free Expense Tracker Template (Google Sheets + CSV)]
Privacy & Security: Where Your Expense Data Lives
When you track expenses digitally, your data matters. Here’s what to look for.
What Users Should Look For
- Data encryption (in transit and at rest)
- Data deletion options (you control your data)
- No account linking required (optional only)
- Export anytime (CSV, Excel, or PDF)
Private Mode Options
The best free expense tracker tools let you:
- Use the tool without creating an account
- Store data in local storage vs cloud storage
- Delete all data with one click
Data Portability
Always choose tools that offer data export. If you can’t export to CSV, you’re locked in. Your expense tracker spreadsheet should always be portable.
Conclusion + Next Step
An expense tracker transforms vague money stress into clear, actionable data. You now know how to set one up in minutes, which categories to use, and how to build a daily routine that sticks. The monthly review process turns raw numbers into real behavior change.
Ready to start? Grab the free template or jump straight into the tool.
➡️ Start Tracking Expenses Now (Free Tool)
[📥 Download Template (Secondary CTA)]
FAQs
Q: What is the best way to track expenses?
A: The best expense tracker tool is one you’ll actually use. Start with a simple expense tracker—either a spreadsheet or a free tool—and upgrade only if needed.
Q: What categories should I use?
A: Begin with 10 or fewer expense categories: housing, utilities, groceries, transportation, dining out, healthcare, entertainment, subscriptions, savings, and debt.
Q: How do I track expenses if I use cash?
A: Keep receipts and log them daily. Alternatively, track the total cash withdrawn and categorize when you reconcile.
Q: How do I track subscriptions?
A: Tag recurring expenses with a “recurring” flag. Review your subscription tracker monthly to identify forgotten services.
Q: Is an expense tracker the same as a budget?
A: No. An expense tracker records what you spent; a budget plans what you’ll spend. Use both for best results.
Q: Should I track every single purchase?
A: Yes, especially when starting. Small purchases reveal the biggest patterns. After a few months, you can simplify.
Q: How long should I track expenses before making changes?
A: Track for one full month before concluding. Three months give you reliable trends and averages.
Q: Can I export my data to Excel/Sheets?
A: Yes—any good expense tracking tool offers CSV export, which opens in both Excel and Google Sheets.
Q: How do I track expenses as a freelancer?
A: Use an expense tracker for freelancers with separate categories for business vs personal. Track receipts for tax-deductible expenses.
Q: How do I create a simple expense tracker in Excel?
A: To create a simple tracker in Excel or Google Sheets, open a new sheet and create five column headers: Date, Description, Category, Amount, and Payment Method. Enter your transactions in rows under these headers. Finally, use the “SUM” formula on the Amount column to see your total spending.
Q: What is the 50/30/20 rule in expense tracking?
A: The 50/30/20 rule is a budgeting framework often used alongside expense trackers. It suggests dividing your after-tax income into three buckets: 50% for Needs (housing, utilities, groceries), 30% for Wants (dining out, entertainment, subscriptions), and 20% for Savings (emergency fund, debt repayment).
Q: Can I use Google Forms to track expenses?
A: Yes, Google Forms is a great mobile-friendly way to track expenses. Create a form with questions for “Amount,” “Category,” and “Merchant,” then link the form to a Google Sheet. Every time you submit the form on your phone, it automatically populates the spreadsheet, eliminating the need to pinch and zoom on a mobile grid.
Q: How do beginners track expenses?
A: Beginners should start with the “60-Second Method.” Choose one easy tool (like a notebook or a simple app), and commit to logging expenses at the same time every day (e.g., right after dinner). Focus on capturing the amount and category first; do not worry about complex analysis until you have built the daily habit.
Q: Is there a free app to track expenses without linking a bank account?
A: Yes, several apps allow manual entry without bank syncing. Google Sheets is the most flexible free option. Other apps like Expensify (free tier) or simple spending log apps allow you to manually input cash and card transactions to ensure privacy and security.

Finance & Expense Automation Specialist With 3 years of experience.